EECS 395
Project A - Particle Systems
Week 1 - A bouncing ball
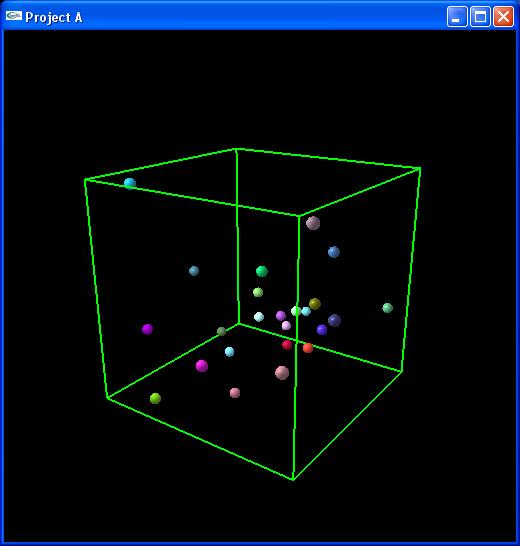
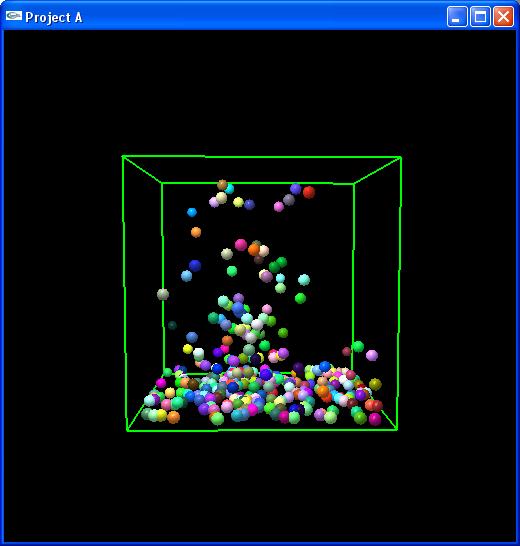
Balls in the box: The first step of setting up a particle system is to get particles. I accomplished that by producing spheres that bounce around in a box. I started by just getting some balls in the box and used an Euler integrator to get them moving. Next, I added simple collision detection: if the ball goes outside of the box, put it back inside the box and reverse the velocity in that direction. Finally, I added the ability to add balls to the box randomly by pressing a key.
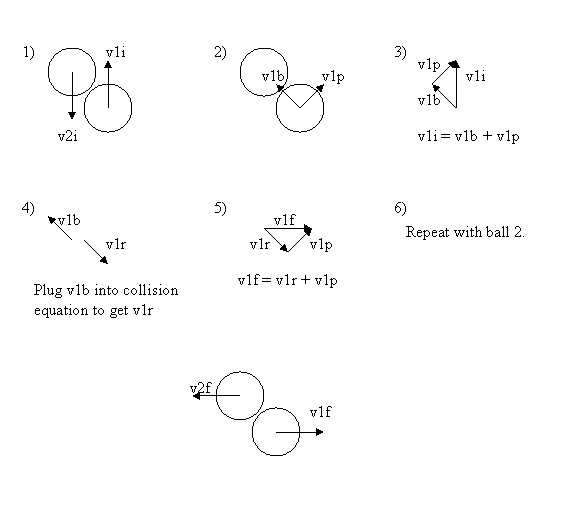
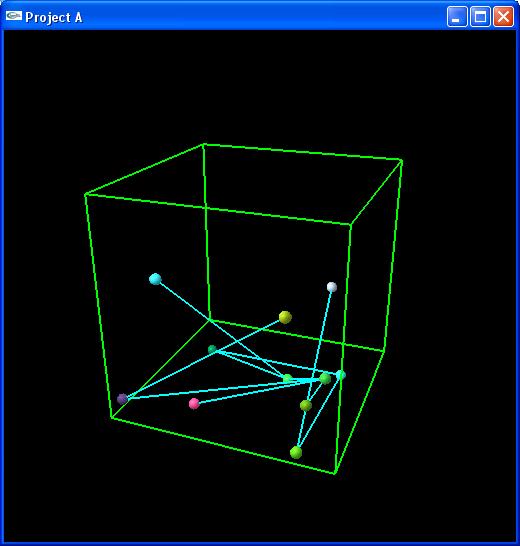
Collision Detection: I decided that I wanted more than just detecting walls aligned with the axes, I wanted to handle collisions between balls realistically. I used the equation for conservation of momentum (m1*v1f + m2*v2f = m1*v1i + m2*v2i) and the definition of the coefficient of restitution (c = (v2f - v1f)/(v1i - v2i)) to solve for the final velocities of the 2 balls. Unfortunately, this only works for 1 dimensional collisions (i.e. the balls have to be traveling directly at one another). I used the following method (example in 2D, but easily transferred to 3D) to handle 3D collisions.
Week 2 - A position dependent force
Cleaning up code: Before doing anything, I cleaned up my code by rewriting and restructuring my entire project. I created a project class which contains everything for the project. I also created classes for lights, a revolving light (derived from light), the camera, color, particles, particle systems, force sets, forces, a gravity force (derived from force), and...
Fountain Force: I created a force class that acts as an air jet, causing the balls in the box to fly up as they pass over it, making it look something like a fountain. The fountain also has a weak force pulling the balls toward the air jet so that they are drawn into it. The force is dependent on the size of the ball as well as the distance from the source of the fountain.
Week 3 - An implicit integrator
Implicit integrator: The problem with using a simple Euler integrator (which I have been using so far) is that they are not very accurate. Also, the error caused by them often adds energy to the system, causing it to become unstable and blow up. An example, though not the best one, can be seen when the coefficient of restitution is turned down so that the balls fall to the floor and stop bouncing and then change the coefficient of restitution back up. Ideally, the balls would still not be bouncing, but due to the error, they begin to bounce again and actually go a little bit higher with each bounce. To prevent this, I implemented an implicit integrator. It works by first using the Euler method to get a guess, then it uses the Euler method again, but with a negative time step to get another guess. Ideally, the this second guess would be the same as the original position. Then I took the difference between the second guess and the original position and add a fraction of the error to the first guess to improve it greatly. The big benefit of the implicit integrator is that even though it still has error, it usually removes energy from the system, preventing it from blowing up.

Week 4 and 5 - Multiple particle systems
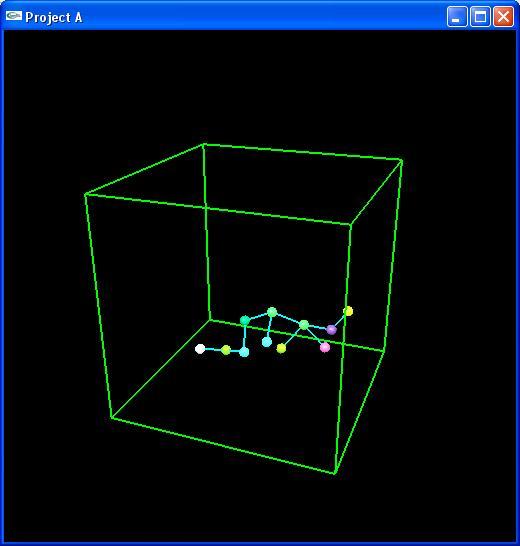
Spring system: I created a new force class to allow springs to connect different particles. The force is dependent on how far the spring is stretched or compressed. I added a new particle system that allows the user to press a button and add a new particle to the system. Every time a new particle is added to the system, all of the springs in the system are removed and new springs are randomly created. This way, the system comes to equilibrium, but then if you add a new particle, the springs are changed, so the system bounces around until it finds its new equilibrium. Also, I made the springs very stiff so that it is a nice demonstration of the problem with Euler integration and how implicit integration solves the problem.
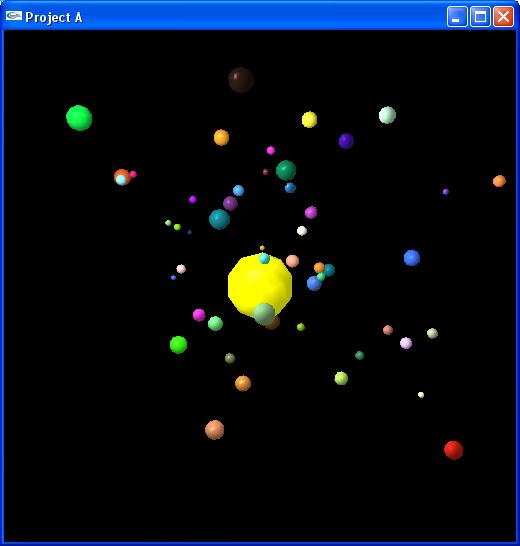
Flocking system: I created a new force class to allow flocking behavior. The force is dependent on the distance between particles: particles are drawn to their neighbors, but if they get too close, they are repelled. I made the magnitude of the force dependent on mass, and I added a large particle that doesn't move to the center of the system so that the particles all flock around it. I made the particles look something like planets, but they flock instead of simply orbit.
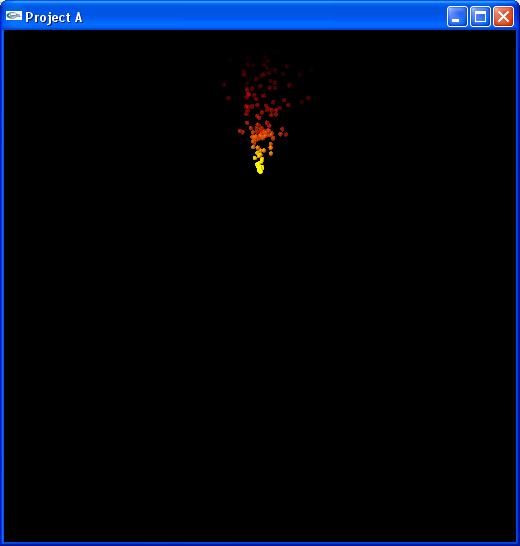
Life cycle system: I created a new force class that allows aging. Particles are spawned at a source with random upward velocity and a yellow color. Then, as they get farther away, they change to red and fade to transparent. This causes the particles to look something like fire (although they would look much more like fire if there were a lot more of them). Once they have completely disappeared, they die and are reborn at the source.
Project B - Ray Tracing
Click the images for a larger view.
Week 1 - Shooting Rays
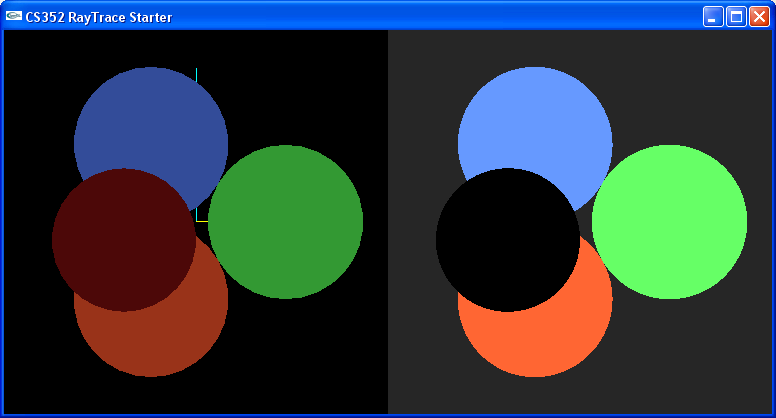
Ambient Light: I spent the majority of my time looking over the starter code and getting a feeling of how a ray tracer works. I got ambient lighting to work by starting the ray off with no color and adding the ambient light of the object that it hit (if any). I also removed the teapot on the left and drew the actual scene there instead.
Week 2 - Starting from scratch
Rewriting Code: I decided to start over from scratch with my own code so that I would learn better and so that I could organize it the way that I like. I started with a main project class that holds everything. Then I added a raytracer class to do the ray tracing. I also added a camera class, an image class, and a scene class. I have a light class and a sphere class, which both inherit from the shape class. This way, lights and spheres can be added to my vector of shapes in my scene class.
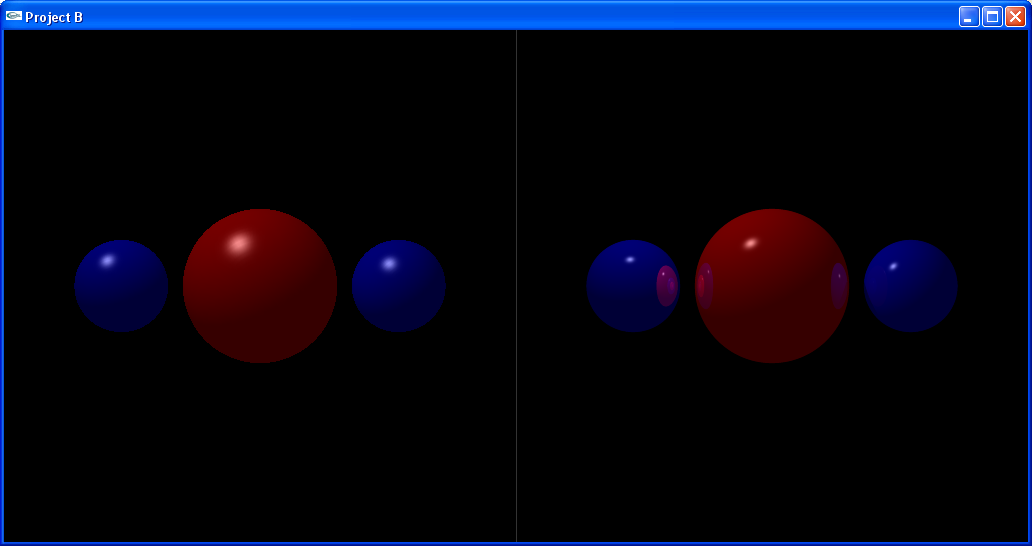
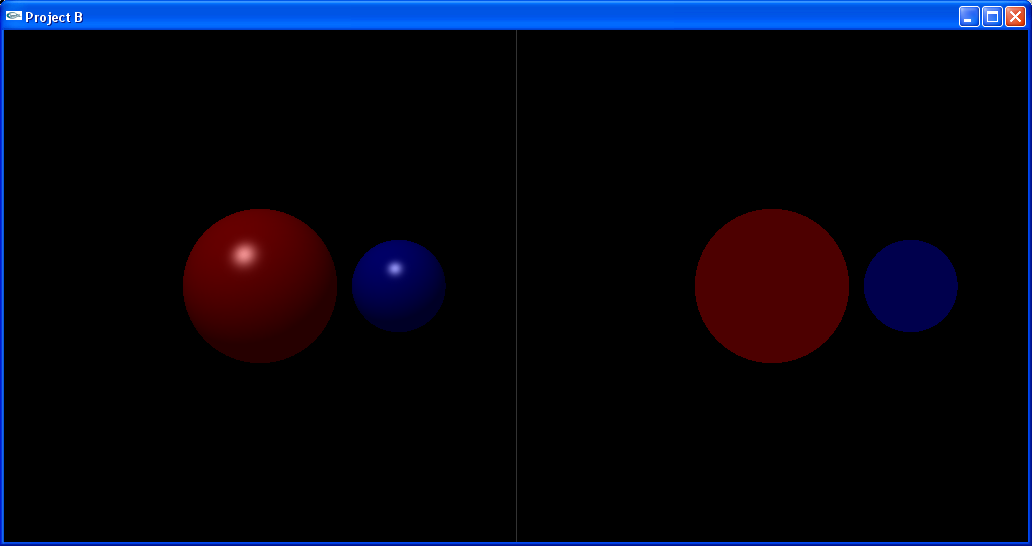
Adding content: I started by adding a light, a red sphere, and a blue sphere to my scene. The scene is rendered with Phong lighting by OpenGL on the left side and the user can control the camera with the mouse. On the right, the scene is rendered by the ray tracer. The ray tracer starts by asking the camera for its position and the position of the bottom left corner of the screen in world space coordinates. It also gets two vectors: one going up along the left side of the screen in world space, and the other going right along the bottom in world space. The ray tracer can then scale these vectors and use the position of the bottom left corner to find the coordinates of the pixel in world space. The ray tracer then creates a bunch of rays, each starting at the camera and traveling through each pixel. Next, the ray loops through each object in the scene and asks the object if it hit it, and if so, when. Then it gets the ambient color of the closest object. Later it will do other things like shadows and reflections.
Week 3 - Reflections
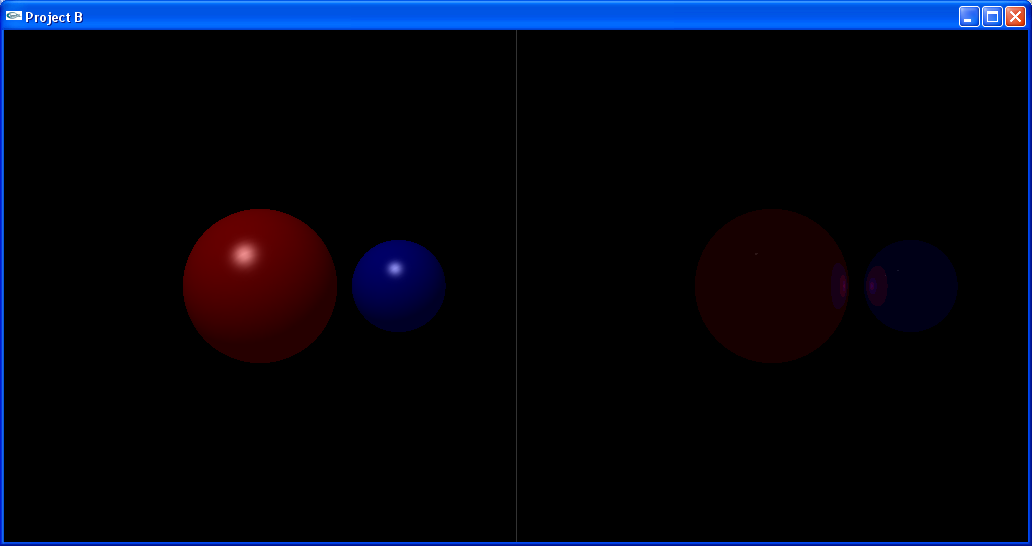
Recursion: I added reflections to the ray tracer using recursion. After a ray hits an object, it is reflected and shot again. Each time it hits an object, it adds that object's ambient color to the color of the ray, and ultimately, the pixel. The user can control the depth of the recursion to prevent it from taking too long to run if rays start bouncing around too much. Later, I will add the ability to change the reflectivity of a material.
Week 4 - Lighting and Shadows
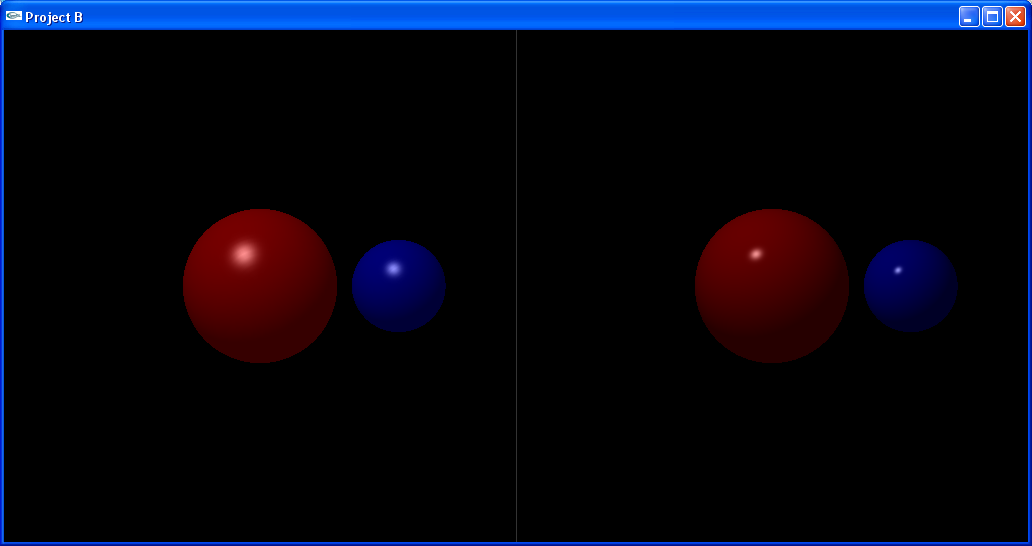
Shadow rays: I added a type field to the ray class so that there are reflection rays and shadow rays. Each time a ray hits an object, it loops through each light in the scene and shoots a shadow ray at it. If the ray hits the light, then the diffuse and specular light is computed and added to the ray. I have turned off reflections until the lighting works properly. I used the Phong lighting model to calculate the specular highlights, but later, I will add the ability to change to the Blinn-Phong lighting model which is used by OpenGL because it is faster (it uses a half-vector instead of a reflection vector). I also added the ability to enter "continuous mode" in which the ray tracer starts tracing again as soon as it finishes. It is decently fast with small window sizes, but I can imagine it will be too slow to be useful when I implement anti-aliasing.
Week 5 - Anti-aliasing, Screenshots, and Final Touches
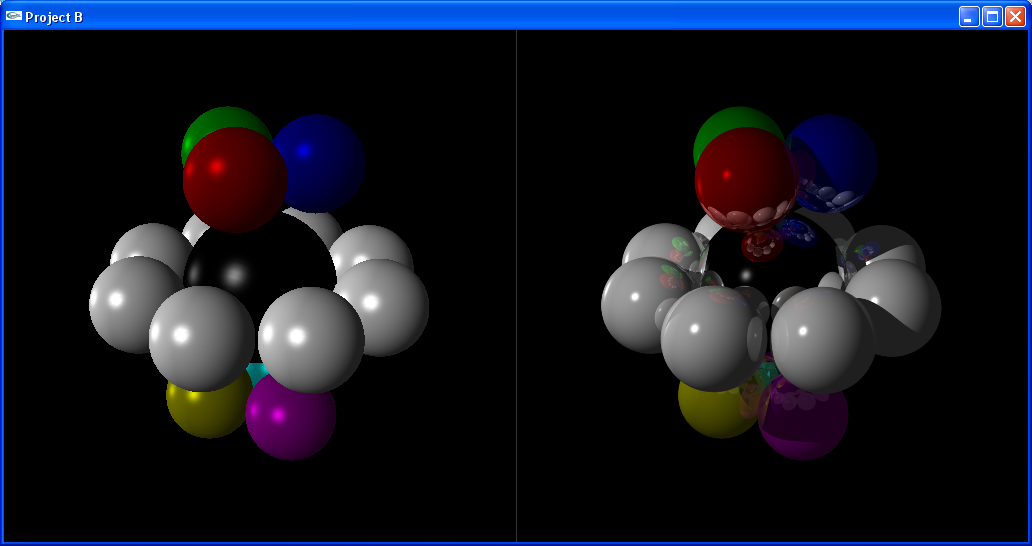
Final Touches: I have added two lights and several spheres, including one fully mirrored sphere. The white spheres vary in reflectivity. It is a nice demo of the reflections and shadows. I also made it so that the trace function takes about 30ms per call as opposed to scanning a specified number of lines.
Screenshots: I added the ability to take screenshots of the right side of the screen and save them as bitmap files. This was fairly simple thanks to the bmpGifts code.
Anti-aliasing: I added the ability for the user to increase and decrease the number of rays shot per pixel (super sampling). This makes the edges in the picture look smoother. Each pixel is subdivided into a grid of "subpixels". A ray is then shot through each subpixel. To get the color of the pixel, the colors of all of the subpixels are weighted and added together. For my weighting algorithm, I made it so that the center pixel has the most weight, and each row or column outward has half the weight of the previous one. I also added the ability to turn on and off jittering. Jittering means that instead of shooting a ray through the center of each subpixel, the ray goes through a random point in each subpixel. The first picture below uses 3x3 super sampling for anti-aliasing. The second picture uses only one ray per pixel, but jittering is turned on (which is why the edges are rough). Click the images for a larger view.